|
Every tool-mans dream and every partners dread... You can hear the conversation now "Whats wrong with it as it is...?" "But I can make it better..." Of course the company who built the thing spent literally hundreds and thousands of dollars on development of their designs and production process but hey what would they know, I can improve it.
There is some truth in modifications but it probably more about personalise to our style than making it better. When the van was delivered it pretty much had everything we wanted but there were a few changes I wanted to make.
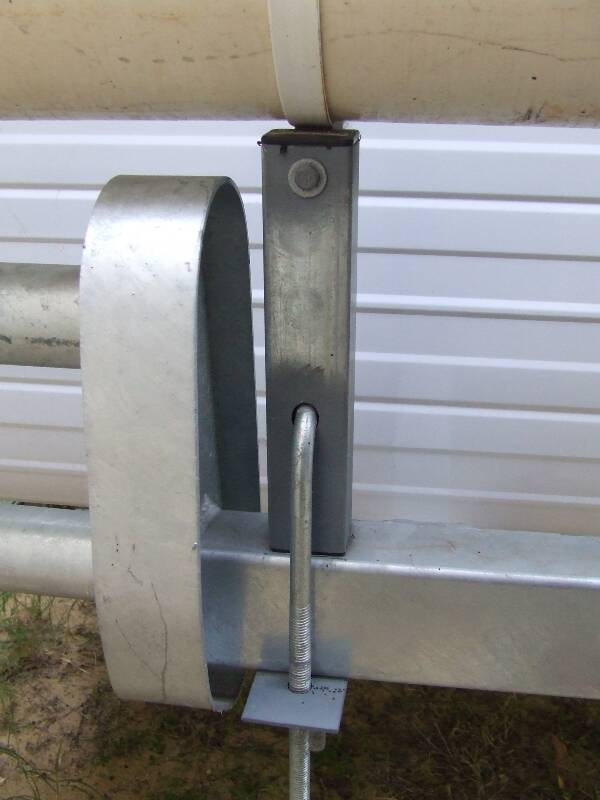
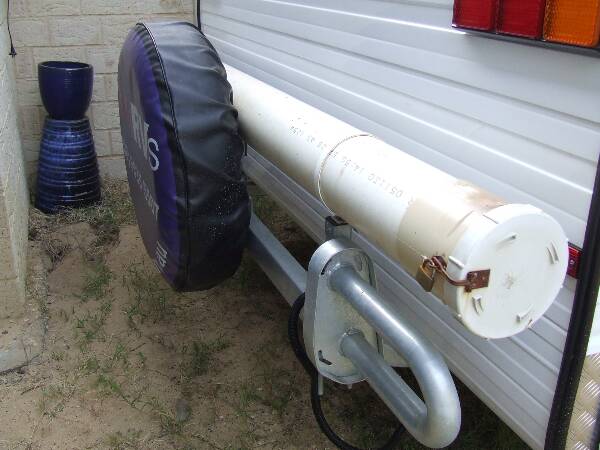
The poles for the awning walls and roof were lying at the bottom of the boot I could see they were going to get damaged and as anything that goes in the boot always ends up at the bottom when you most want it. I decided to fit a pole carrier in the form of a tube to protect them and give easy access. Now I didn't want to weld or drill and screw brackets on to any of the existing bar work but I did see the manufacturer of the van had used a clamping arrangement for the rear spare tire. I thought this was a good idea as it allowed easy removal and adjustment when making room for other additions.
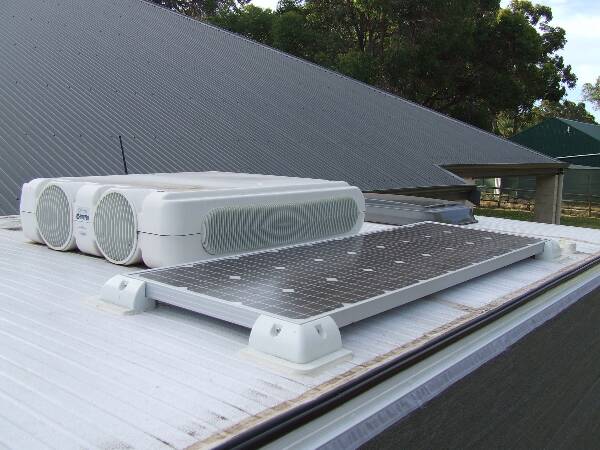
We wanted solar to charge the battery when traveling as, from what I had researched I didn't have much faith in being able to charge the battery correctly from the car alternator due to volt drop, at least not without the addition of special equipment. Solar had worked quite well on our old van so did not see a reason why it wouldn't work here. Fortunately the van was pre-wired saving that hassle of running wires from the roof to the boot. I mounting a 120 Watt panel on the roof using the ABS Corner mounting brackets then gluing them down with Sika Flex 11fc. I used 11fc as again from research, it would have enough adhesion strength but flexibility to in theory to cope with the expansion and contraction of the roof. I installed a Morning Star Pro in the boot to regulate voltage. The Pro Star has a readout of battery voltage and solar amps so I could see what was going into the battery. I put fuses on both the incoming solar as well as the battery mainly to protect against shorts but also make isolation easier. Generally the power up process for a solar installation is controller to battery first then connect the panels.
Since I wasn't planning to use the Anderson lead to charge the caravan battery from the car I ended up replacing the blocking diode with a fuse and now able to use this as a 12v extension lead. I can either power a device such as a fridge or compressor or plug in a regulated portable solar panel for additional capacity. I found out later this is proberbly not the most efficient method for charging. When you have 2 regulators in parrallel, as voltages approach charged level one regulator will switch to float as it thinks the battery is at full charge.
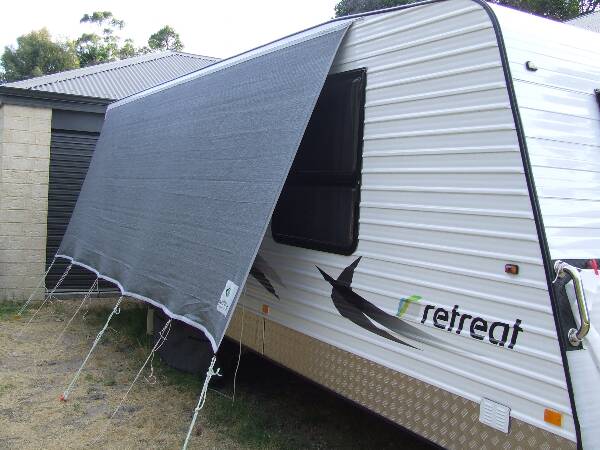
While the Door side wall of the van can be protected from the sun using the awning the same is not for the roadside of the van so unless you park under a tree or some other shade the sun is going to spend at least half of the day radiating on this wall. Since the fridge is against this wall this tends to make it work harder not to mention warming the inside of the van up. To try to keep the sun off this wall we installed a sail track across the top edge of the wall running almost the full length of the van. We then purchased a Coast to Coast side wall to slide it into the track then tie it down with ropes and pegs. While this doesn't cover the whole wall it keeps the important areas in shade such as the fridge and pantry areas in the kitchen. Unfortunately this doesn't help heat coming through the roof but being white reflects a lot of the heat from sun radiation. |
Modifications
- Details
- Written by: Andrew